
本文档将给出一些详尽的示例教程。
如需了解创建应用、读写数据等基础操作,请参考文档 快速入门。
教程说明
示例说明
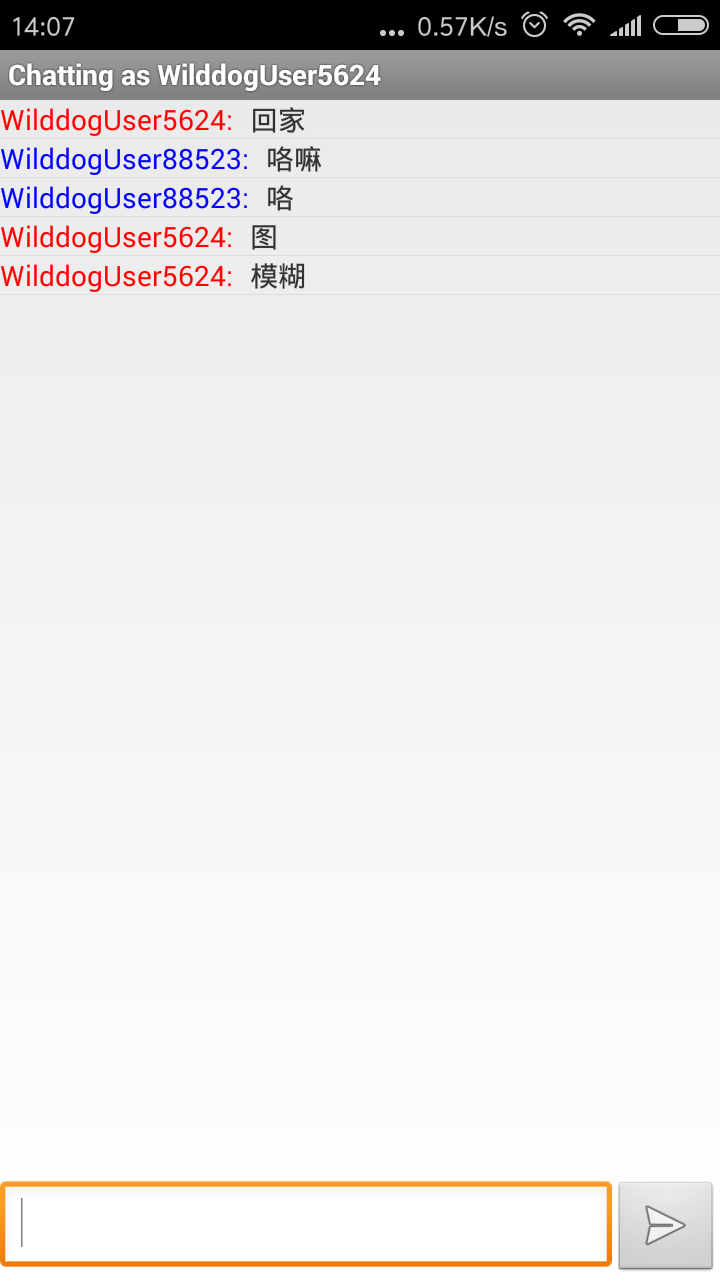
本教程以实时通信文字聊天为例,讲解如何通过 Wilddog Sync 实现实时聊天功能。
在示例中可以支持多人聊天,用户以游客的身份匿名聊天等。百余行代码即可完全实现这些功能,可见 Sync 的简单与强大。
实时聊天示例的最终的效果如下:
具体步骤
1. 安装 SDK
SDK 的安装方式有 2 种:
- 使用gradle
创建新的工程,在应用级别的build.gradle里添加如下代码
|
- 使用maven
|
2.建立 SyncReference 引用
初始化一个 SyncReference 对象,该对象连接到 WILDDOG_URL 。
// 初始化 |
3. 监听输入
监听聊天应用的chat节点,一旦有新的聊天内容被增加进去时,客户端会收到推送。
将推送内容解析,并且更新UI界面。
mListener = mWilddogRef.addChildEventListener(new ChildEventListener() {
        @Override
        public void onChildAdded(DataSnapshot dataSnapshot, String previousChildName) {

            T model = (T) dataSnapshot.getValue(WilddogListAdapter.this.mModelClass);
            String key = dataSnapshot.getKey();

            // Insert into the correct location, based on previousChildName
            if (previousChildName == null) {
                mModels.add(0, model);
                mKeys.add(0, key);
            } else {
                int previousIndex = mKeys.indexOf(previousChildName);
                int nextIndex = previousIndex + 1;
                if (nextIndex == mModels.size()) {
                    mModels.add(model);
                    mKeys.add(key);
                } else {
                    mModels.add(nextIndex, model);
                    mKeys.add(nextIndex, key);
                }
            }

            notifyDataSetChanged();
        }

        @Override
        public void onChildChanged(DataSnapshot dataSnapshot, String s) {
            // One of the mModels changed. Replace it in our list and name mapping
            String key = dataSnapshot.getKey();
            T newModel = (T) dataSnapshot.getValue(WilddogListAdapter.this.mModelClass);
            int index = mKeys.indexOf(key);

            mModels.set(index, newModel);

            notifyDataSetChanged();
        }

        @Override
        public void onChildRemoved(DataSnapshot dataSnapshot) {

            // A model was removed from the list. Remove it from our list and the name mapping
            String key = dataSnapshot.getKey();
            int index = mKeys.indexOf(key);

            mKeys.remove(index);
            mModels.remove(index);

            notifyDataSetChanged();
        }

        @Override
        public void onChildMoved(DataSnapshot dataSnapshot, String previousChildName) {

            // A model changed position in the list. Update our list accordingly
            String key = dataSnapshot.getKey();
            T newModel = (T) dataSnapshot.getValue(WilddogListAdapter.this.mModelClass);
            int index = mKeys.indexOf(key);
            mModels.remove(index);
            mKeys.remove(index);
            if (previousChildName == null) {
                mModels.add(0, newModel);
                mKeys.add(0, key);
            } else {
                int previousIndex = mKeys.indexOf(previousChildName);
                int nextIndex = previousIndex + 1;
                if (nextIndex == mModels.size()) {
                    mModels.add(newModel);
                    mKeys.add(key);
                } else {
                    mModels.add(nextIndex, newModel);
                    mKeys.add(nextIndex, key);
                }
            }
            notifyDataSetChanged();
        }

        @Override
        public void onCancelled(WilddogError wilddogError) {
            Log.e("WilddogListAdapter", "Listen was cancelled, no more updates will occur");
        }

    });
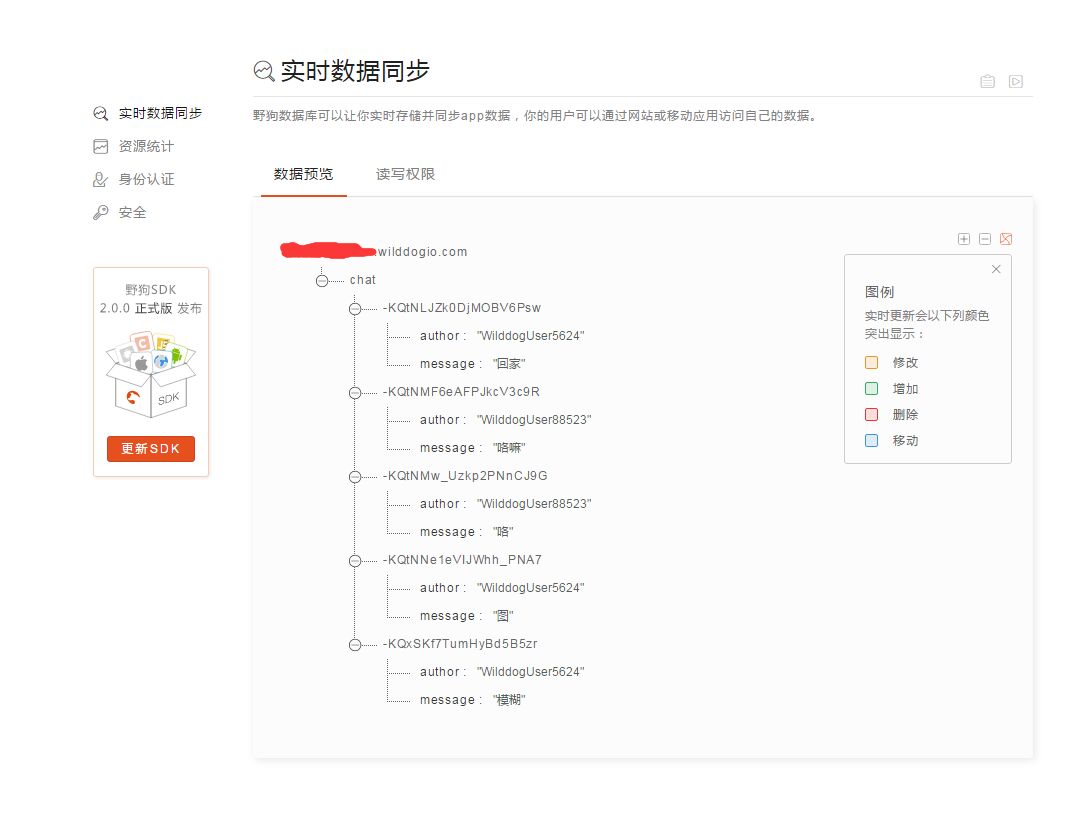
网页端的数据结构如下:
4.获取输入
首次调用增加监听方法会将数据直接返回,通过mWilddogRef.limitToLast(50)方法,可以返回最后50条聊天的内容。
mChatListAdapter = new ChatListAdapter(mWilddogRef.limitToLast(50), this, R.layout.chat_message, mUsername);
利用DataSnapshot对象的getValue()方法获取它们的 value 如下 :
T model = (T) dataSnapshot.getValue(WilddogListAdapter.this.mModelClass);
           String key = dataSnapshot.getKey();
6.将聊天内容发送到服务器
通过 push()方法生成一个聊天消息的Id ,然后通过创建Chat对象来封装对应的 value ,并调用 setValue() 把数据推送到服务端。
private void sendMessage() {
    EditText inputText = (EditText) findViewById(R.id.messageInput);
    String input = inputText.getText().toString();
    if (!input.equals("")) {
        // Create our 'model', a Chat object
        Chat chat = new Chat(input, mUsername);
        // Create a new, auto-generated child of that chat location, and save our chat data there
        mWilddogRef.push().setValue(chat);
        inputText.setText("");
    }
}
获取示例源码
点此获取完整的示例源码。
